图片预览卡片
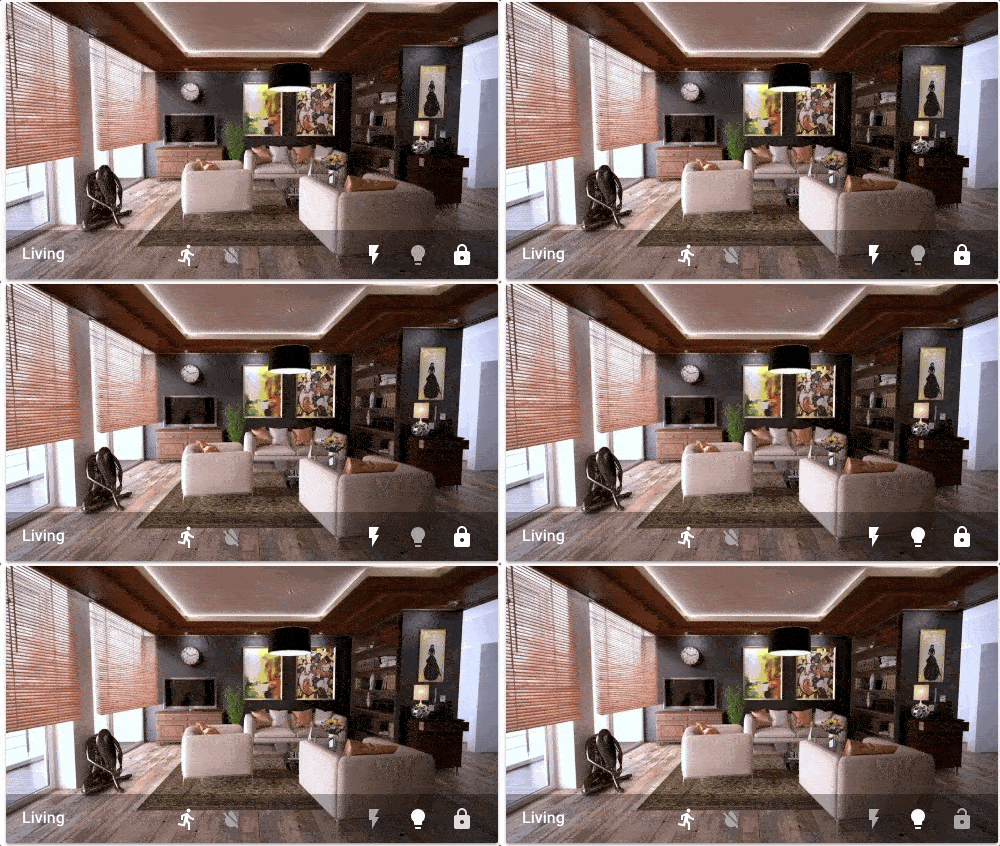
图片预览卡片显示一张图像,并允许你在卡片上放置小图标来显示实体状态,从而可以从那里控制这些实体。在下图中:右侧的实体允许切换操作,其他实体则显示更多信息对话框。

客厅的图片预览卡片。
将图片预览卡片添加到你的仪表板
-
要添加卡片,请按照从视图添加卡片中的步骤1-4进行操作。
- 在步骤2中,在按卡片标签上,选择图片实体卡片。
-
添加图片:
- 上传图片让你从显示Home Assistant界面的系统中选择图像。
- 本地路径让你选择存储在Home Assistant上的图像。例如:
/homeassistant/images/lights_view_background_image.jpg。- 要在Home Assistant上存储图像,你需要配置对文件的访问,例如通过Samba或Studio Code Server附加组件。
- 网络URL让你使用来自网络的图像。例如
https://www.home-assistant.io/images/frontpage/assist_wake_word.png。
-
定义特定于图片实体卡片的参数。
- 有关特定设置的描述,请参阅YAML配置下的描述。
- 这些设置也适用于UI。
-
保存你的更改。
YAML 配置
当你使用YAML模式或只是更喜欢在UI中的代码编辑器中使用YAML时,以下YAML选项可用。
配置变量
type 字符串 必填
picture-glance
entities 列表 必填
实体或实体对象的列表。
title 字符串 (可选)
卡片标题。
image 字符串 (可选)
背景图像URL。
image_entity 字符串 (可选)
要显示的图像或人员实体。
camera_image 字符串 (可选)
作为背景图像的摄像头实体。
camera_view 字符串 (可选,默认:auto)
"live"将在启用stream时显示实时视图。
state_image 映射 (可选)
基于实体状态的背景图像。
state 字符串 (可选)
state: image-url,查看下面的示例。
state_filter 映射 (可选)
aspect_ratio 字符串 (可选)
强制图像的高度为宽度的比例。有效格式:高度百分比值(23%)或用冒号或"x"分隔符表示的比例(16:9或16x9)。对于比例,第二个元素可以省略,默认为"1"(1.78等于1.78:1)。
entity 字符串 (可选)
用于state_image和state_filter的实体。
show_state 布尔值 (可选,默认:false)
显示实体状态文本。
theme 字符串 (可选)
使用任何已加载的主题覆盖此卡片的主题。有关主题的更多信息,请参阅前端文档。
tap_action 映射 (可选)
点击卡片时执行的操作。参见操作文档。
hold_action 映射 (可选)
点击并按住时执行的操作。参见操作文档。
double_tap_action 映射 (可选)
双击时执行的操作。参见操作文档。
实体的选项
如果你将实体定义为对象而不是字符串,你可以添加更多自定义和配置:
配置变量
entity 字符串 必填
实体ID。
attribute 字符串 (可选)
要显示的实体属性,而不是状态。
prefix 字符串 (可选)
在属性值之前显示的前缀。
suffix 字符串 (可选)
在属性值之后显示的后缀。
icon 字符串 (可选)
覆盖默认图标。
show_state 布尔值 (可选,默认:true)
显示实体状态文本。
tap_action 映射 (可选)
点击卡片时执行的操作。参见操作文档。
hold_action 映射 (可选)
点击并按住时执行的操作。参见操作文档。
double_tap_action 映射 (可选)
双击时执行的操作。参见操作文档。
如何使用state_filter
指定不同的CSS过滤器
state_filter:
  "on": brightness(110%) saturate(1.2)
  "off": brightness(50%) hue-rotate(45deg)
entity: switch.decorative_lights
示例
本节列出了一些关于如何使用图片预览卡片的示例。
创建卡片来控制摄像头
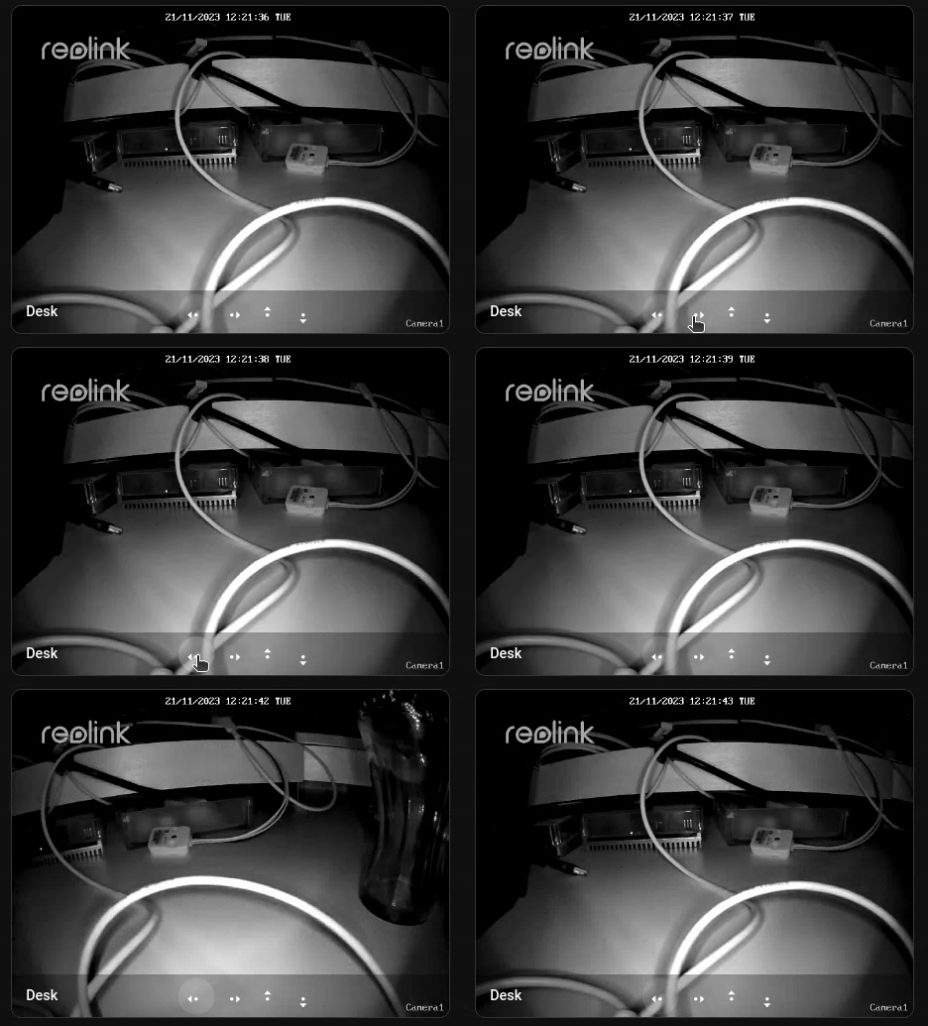
如果你的摄像头支持PTZ(可以向不同方向移动),你可以使用图片预览卡片来控制摄像头。

控制摄像头的图片预览卡片。
-
选择你的摄像头实体。
- 不需要图像路径和图像实体。

- 不需要图像路径和图像实体。
-
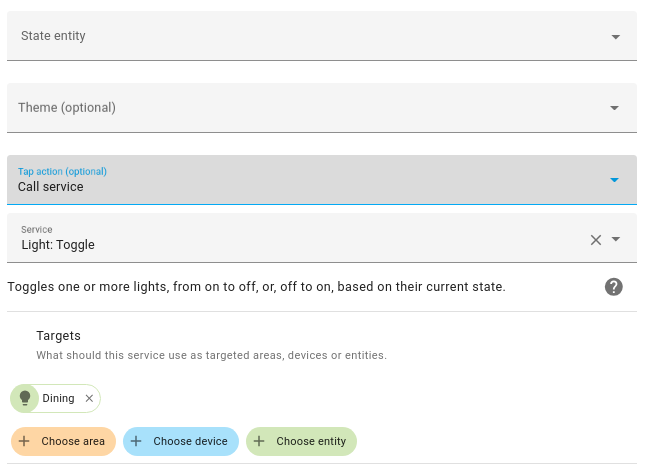
如果你想在点击卡片本身时发生某些事情,定义一个点击操作。
- 这里,我们切换一个灯。

- 这里,我们切换一个灯。
-
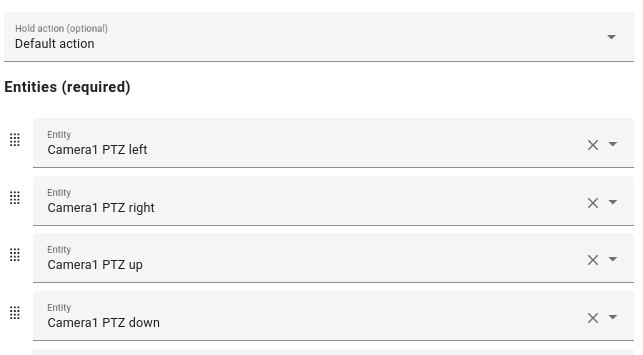
选择用于向左、向右、向上或向下移动摄像头的实体。

-
选择显示代码编辑器。
-
为每个实体指定一个图标,如YAML示例中所示。
-
要让按钮在按下时反应(而不是弹出对话框):
- 对于每个实体,在
tap_action下,使用button.press操作。
- 对于每个实体,在
camera_view: live
type: picture-glance
title: Desk
entities:
  - entity: button.camera1_ptz_left
    icon: mdi:pan-left
    tap_action:
      action: perform-action
      perform_action: button.press
      data:
        entity_id: button.camera1_ptz_left
  - entity: button.camera1_ptz_right
    icon: mdi:pan-right
    tap_action:
      action: perform-action
      perform_action: button.press
      data:
        entity_id: button.camera1_ptz_right
  - entity: button.camera1_ptz_up
    icon: mdi:pan-up
    tap_action:
      action: perform-action
      perform_action: button.press
      data:
        entity_id: button.camera1_ptz_up
  - entity: button.camera1_ptz_down
    icon: mdi:pan-down
    tap_action:
      action: perform-action
      perform_action: button.press
      data:
        entity_id: button.camera1_ptz_down
camera_image: camera.camera1_sub
tap_action:
  action: perform-action
  perform_action: light.toggle
  target:
    entity_id: light.philips_929003052501_01_huelight
- 就是这样。你现在可以从仪表板上的图片预览卡片控制你的摄像头了。
更多示例
type: picture-glance
title: Living room
entities:
  - switch.decorative_lights
  - light.ceiling_lights
  - lock.front_door
  - binary_sensor.movement_backyard
  - binary_sensor.basement_floor_wet
image: /local/living_room.png
将摄像头图像显示为背景:
type: picture-glance
title: Living room
entities:
  - switch.decorative_lights
  - light.ceiling_lights
camera_image: camera.demo_camera
显示摄像头图像而不添加额外实体:
type: picture-glance
title: Front garden
entities: []
camera_image: camera.front_garden_camera
根据实体状态使用不同的图像:
type: picture-glance
title: Living room
entities:
  - switch.decorative_lights
  - light.ceiling_lights
state_image:
  "on": /local/living_room_on.png
  "off": /local/living_room_off.png
entity: group.living.room